
Connecting your Beats headphones or earbuds to your iPhone is super simple! Just a few quick steps, and you’ll be enjoying your favorite music in no time. This guide will walk you through the easiest ways to pair your Beats, ensuring a seamless audio experience right away.
Welcome! Are you excited to sync your stylish Beats headphones with your iPhone but feeling a little unsure where to start? It’s a common feeling, and many people find the initial pairing process a bit puzzling. Don’t worry, you’re not alone! Getting your Beats and iPhone talking to each other is actually incredibly straightforward, and I’m here to make it as easy as tapping your screen. We’ll cover the simplest methods, including the super-fast automatic pairing for newer Beats models, and the reliable manual Bluetooth connection for any pair. By the end of this guide, you’ll be a pro at connecting your Beats, ready to dive into your music, podcasts, or calls with confidence. Let’s get your audio adventure started!
Understanding Beats and Your iPhone
Beats by Dre has become a household name for its distinctive sound quality and fashionable design. They offer a range of headphones and earbuds, from the popular Beats Solo and Beats Studio to the compact Beats Fit Pro and Beats Powerbeats Pro. iPhones, with their seamless integration of hardware and software, are designed to work beautifully with a wide variety of Bluetooth audio devices, including Beats. The magic behind connecting them is Bluetooth technology, a wireless standard that allows devices to communicate over short distances.
For many newer Beats models, Apple has made the pairing process exceptionally easy, leveraging the “W1” or “H1” chip technology found in both the Beats and iPhones. This means that once you’ve paired them with one Apple device, they can often automatically connect to other Apple devices signed into the same iCloud account. However, if you have an older Beats model or are experiencing connection issues, a simple manual Bluetooth pairing is always an option.
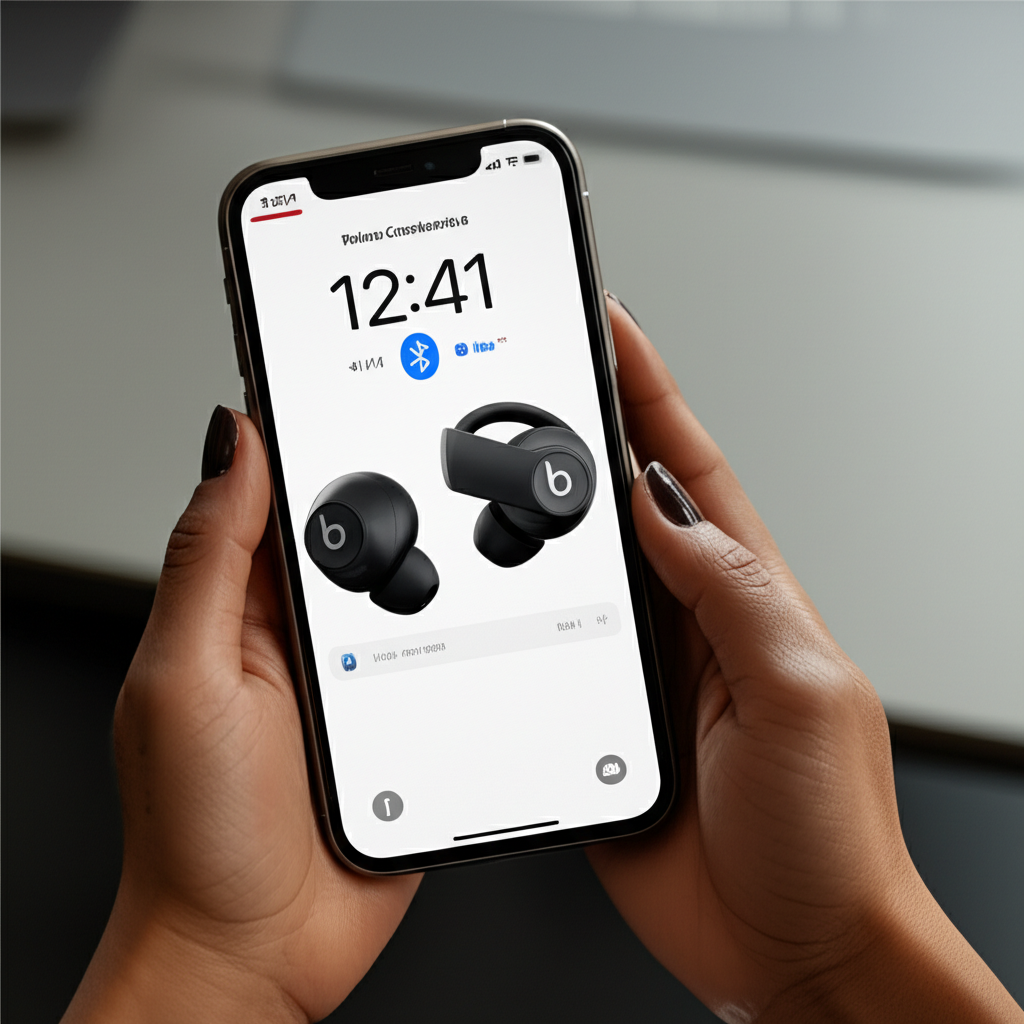
The Effortless Way: Automatic Pairing (for newer Beats)
If you have a newer generation of Beats headphones or earbuds, like the Beats Studio Buds, Beats Fit Pro, or newer Solo3, Studio3, or Powerbeats3 models, you’re in for a treat. Apple’s W1 and H1 chips simplify the connection process significantly. It’s designed to be as intuitive as possible, often requiring just a single tap.
Step-by-Step Automatic Pairing:
- Ensure Bluetooth is On: First, make sure Bluetooth is enabled on your iPhone. You can do this by going to Settings > Bluetooth and toggling the switch to green. Alternatively, you can swipe down from the top-right corner of your screen (or up from the bottom on older iPhones) to open Control Center and tap the Bluetooth icon to turn it blue.
- Put Your Beats in Pairing Mode: This is where it gets excitingly simple.
- For Beats Studio Buds and Beats Fit Pro: Ensure they are in their charging case with the lid open.
- For other W1/H1 chip enabled Beats (like Solo3, Studio3, Powerbeats3): Press and hold the power button on your Beats for about 3-5 seconds until the indicator light flashes white.
- Unlock Your iPhone: Make sure your iPhone is unlocked and on the Home Screen.
- Bring Your Beats Close: Hold your Beats, with the charging case open or the power button activated, near your unlocked iPhone.
- Wait for the Setup Screen: A setup animation should appear on your iPhone screen. This screen will show your Beats and prompt you to connect.
- Tap “Connect”: Simply tap the “Connect” button on the screen.
- Follow On-Screen Prompts: If prompted, you might need to hold the power button down for a few more seconds. For Beats Studio Buds and Beats Fit Pro, you might also be guided through setting up “Hey Siri” or spatial audio.
- Confirmation: Once connected, you’ll see a confirmation message. Your Beats will now appear in your Bluetooth list and are ready to use!
This automatic pairing method is a fantastic example of how Apple streamlines its ecosystem. Once connected, your Beats will also be available to connect to other Apple devices like your iPad or Mac if they are signed into the same iCloud account. Simply open the case or turn on your Beats near those devices, and they should connect automatically.
The Reliable Method: Manual Bluetooth Pairing
Even if your Beats don’t support the automatic W1/H1 chip pairing, or if you’re connecting to an Android device or a computer, the standard Bluetooth pairing process is just as effective. It’s a universal method that works for almost all Bluetooth-enabled devices.
Step-by-Step Manual Pairing:
- Turn On Your Beats: Press and hold the power button on your Beats until the indicator light flashes. This signifies they are in pairing mode. The exact location of the power button can vary slightly by model, but it’s usually on one of the earcups or the controller module.
- Open iPhone Settings: On your iPhone, navigate to Settings.
- Go to Bluetooth: Tap on Bluetooth.
- Enable Bluetooth: Ensure the Bluetooth toggle is switched on (green). Your iPhone will start scanning for nearby Bluetooth devices.
- Find Your Beats: Under the “Other Devices” or “Devices” list, you should see your Beats headphones or earbuds appear. They will typically be listed by their model name (e.g., “Beats Studio3,” “Powerbeats Pro,” or simply “Beats”).
- Tap to Pair: Tap on the name of your Beats in the list.
- Confirmation: Once paired, your Beats will move to the “My Devices” list and show “Connected” next to their name. The indicator light on your Beats will usually turn solid white or another solid color, indicating a successful connection.
This method is your go-to for any Bluetooth device. It’s straightforward and ensures a stable connection once established.
Connecting Beats to iPhone: A Comparison Table
To help you quickly identify the best method for your Beats, here’s a quick comparison:
| Feature | Automatic Pairing (W1/H1 Chip) | Manual Bluetooth Pairing |
|---|---|---|
| Ease of Use | Extremely Easy (1-tap setup) | Easy (Standard Bluetooth steps) |
| Speed | Very Fast (seconds) | Fast (typically under a minute) |
| Required Beats Models | Beats with W1 or H1 chip (e.g., Solo3, Studio3, Powerbeats3, BeatsX, Beats Studio Buds, Beats Fit Pro) | All Bluetooth-enabled Beats models |
| iPhone OS Requirement | iOS 10 or later for W1 chip, iOS 13 or later for H1 chip | iOS 7 or later |
| iCloud Syncing | Yes, connects to other Apple devices automatically | No, requires manual pairing on each device |
| Troubleshooting Level | Minimal | Slightly more involved if issues arise |
As you can see, if your Beats support automatic pairing, it’s definitely the quickest and most integrated way to connect. However, manual pairing is a universal solution that works reliably for all Beats models and even devices beyond the Apple ecosystem.
Troubleshooting Common Connection Issues
Sometimes, even with the simplest steps, technology can throw a curveball. If you’re having trouble connecting your Beats to your iPhone, don’t fret! Here are some common issues and their solutions:
Beats Not Showing Up in Bluetooth List:
- Are they in pairing mode? Double-check that your Beats are actively in pairing mode (indicator light flashing).
- Is Bluetooth on? Confirm Bluetooth is enabled on your iPhone.
- Restart both devices: Turn off Bluetooth on your iPhone, wait a few seconds, then turn it back on. You can also try restarting your iPhone completely. For your Beats, turn them off and then back on, and re-initiate pairing mode.
- Forget the device: If you’ve previously paired your Beats, try “forgetting” them from your iPhone’s Bluetooth settings. Go to Settings > Bluetooth, tap the “i” icon next to your Beats, and select “Forget This Device.” Then, try pairing again from scratch.
Connection is Unstable or Drops Frequently:
- Distance: Ensure your iPhone and Beats are within the optimal Bluetooth range (usually around 30 feet or 10 meters without obstructions).
- Interference: Other wireless devices, microwaves, or even dense building materials can interfere with Bluetooth signals. Try moving to a different location or turning off other nearby wireless devices temporarily.
- Low Battery: A low battery on either your Beats or your iPhone can sometimes cause connection instability. Charge both devices.
- Software Updates: Make sure your iPhone is running the latest version of iOS. Sometimes, bugs in older software can cause connection problems. Go to Settings > General > Software Update.
Audio Stuttering or Poor Sound Quality:
- Check Bluetooth Codec: While iPhones typically manage this automatically, sometimes a stronger connection can improve quality. Ensure you’re not too far from your iPhone.
- Close Background Apps: Too many apps running in the background on your iPhone can sometimes consume resources that affect audio processing.
- Reset Beats: Many Beats models have a reset function. Check your specific Beats model’s manual or Apple’s support site for instructions on how to perform a factory reset. This can often resolve persistent audio issues. For example, for many Beats wireless headphones, you might hold the power button and volume down button simultaneously for 10 seconds.
Beats Not Connecting to Multiple Devices:
If you’ve paired your Beats with an Apple device and now want to connect them to a non-Apple device (or vice-versa) and they aren’t switching automatically, you might need to manually trigger pairing mode again on your Beats. Once they are in pairing mode, your new device should be able to discover and connect to them.
For more in-depth troubleshooting specific to your Beats model, the Apple Support page for Beats is an excellent resource.
Advanced Tips for Your Beats and iPhone Connection
Once your Beats are successfully connected, there are a few extra things you can do to enhance your experience:
Using the Beats App (for select models)
For certain Beats models, like the Beats Studio Buds and Beats Fit Pro, Apple offers a dedicated Beats app (which is integrated into iOS settings for these models). This app allows you to:
- Check battery levels for your Beats and their charging case.
- Customize controls (e.g., assign specific functions to button presses).
- Manage noise cancellation modes (Active Noise Cancellation and Transparency).
- Update firmware for your Beats.
- Set up and customize Spatial Audio with dynamic head tracking.
For Beats Studio Buds and Beats Fit Pro, these settings are found directly within your iPhone’s Settings app under the name of your Beats model when they are connected.
Optimizing Battery Life
To ensure your Beats last as long as possible:
- Store them properly: Always store your Beats in their charging case when not in use. This protects them and keeps them charged.
- Manage ANC: Active Noise Cancellation (ANC) consumes more battery. If you don’t need it, switch to Transparency mode or turn it off to save power.
- Keep firmware updated: Firmware updates can sometimes include battery performance optimizations.
Understanding iCloud Device Syncing
This is a game-changer for Apple users. If your Beats have the W1 or H1 chip and are paired to your iPhone, they automatically become available on your other Apple devices (iPad, Mac, Apple Watch) as long as:
- All devices are signed into the same Apple ID using iCloud.
- Bluetooth is turned on for all devices.
- The devices are running a compatible operating system version.
To switch between devices, simply have your Beats near the new device and select them from the audio output menu (Control Center on iPhone/iPad, Bluetooth menu on Mac). It’s incredibly seamless.
Frequently Asked Questions (FAQ)
Q1: Do I need a special app to connect my Beats to my iPhone?
A: For most newer Beats models (like Studio Buds, Fit Pro, Solo3, Studio3), the connection is handled directly through your iPhone’s Bluetooth settings. For some specific features or older models, there might be an associated app or integrated settings within iOS. Apple has made it very streamlined!
Q2: My Beats won’t automatically connect. What should I do?
A: Ensure Bluetooth is on for both devices. If they were previously connected, try “forgetting” the device in your iPhone’s Bluetooth settings and re-pairing. Also, make sure your Beats are fully charged and in pairing mode (indicator light flashing).
Q3: Can I connect my Beats to my iPhone and my laptop at the same time?
A: Most Beats models can only maintain an active connection with one device at a time. However, if they support automatic switching via the W1/H1 chip, they can remember multiple devices. You’ll typically need to manually disconnect from one device before connecting to another, or your iPhone might automatically switch if audio starts playing on it.
Q4: How do I know if my Beats have the W1 or H1 chip?
A: Beats models that typically include these chips are: BeatsX, Solo2 Wireless (later models), Solo3 Wireless, Powerbeats3 Wireless, Beats Studio3 Wireless, and the newer Beats Studio Buds and Beats Fit Pro. If you purchased them recently and they are from Apple’s Beats line, they likely have one of these chips.
Q5: What does the flashing white light on my Beats mean?
A: A flashing white light usually indicates that your Beats are in pairing mode and ready to connect to a new device. Once successfully paired, the light typically turns solid.
Q6: How do I update the firmware on my Beats?
A: For Beats Studio Buds and Beats Fit Pro, firmware updates happen automatically over-the-air when your Beats are connected to your iPhone, charged, and on Wi-Fi. For other models, you might need to connect them to a computer with iTunes or check Apple’s support site for specific instructions.
Q7: My Beats sound distorted or choppy. What’s wrong?
A: This can be due to a weak Bluetooth signal, interference, or low battery. Try moving closer to your iPhone, ensuring no obstructions are between your devices, and charging your Beats. Restarting both devices can also help.
Conclusion
Connecting your Beats headphones or earbuds to your iPhone is designed to be a simple, enjoyable process. Whether you’re using the effortless automatic pairing for newer models or the reliable manual Bluetooth connection, you’re just a few taps away from immersing yourself in your audio. We’ve covered the step-by-step guides, explored troubleshooting tips for common hiccups, and even touched on some advanced features to enhance your listening experience. Remember, if you ever feel stuck, your iPhone’s Bluetooth settings and Apple’s support resources are always there to help. Now go ahead, pair those Beats, and let the music play!