
Speed up videos on your iPhone easily! Learn a genius trick to adjust playback speed for any video directly within the Photos app or by using simple editing tools. Get perfect slow-motion or fast-forward effects without needing complicated software.
Ever watched a video on your iPhone and wished it was just a little bit faster? Maybe you recorded a long, drawn-out moment and want to get to the good part quicker, or perhaps you’re creating a fun, sped-up montage. Whatever your reason, speeding up a video on your iPhone is surprisingly simple, and you don’t need to be a tech whiz to do it! Many iPhone users don’t realize how many powerful editing features are built right into their device, ready to go. We’re here to show you a straightforward, genius trick that will have you adjusting video speeds like a pro in no time. Get ready to transform your videos with just a few taps!
Why Would You Want to Speed Up a Video on Your iPhone?
There are tons of fun and practical reasons to speed up a video on your iPhone. Think about it: you’ve captured a beautiful sunset that took ages to unfold, or maybe you’ve recorded a lengthy process like cooking or assembling furniture. Instead of making your friends or followers sit through every second, you can condense it into an engaging, fast-paced clip. Here are a few common scenarios where speeding up a video comes in handy:
- Time-Lapses: Capture long events like cloud movements, construction, or a day at the park and condense them into a short, dynamic video.
- Tutorials & Demonstrations: Show how to do something complex or time-consuming quickly and efficiently.
- Travel Vlogs: Condense scenic drives or city walks to highlight the journey without lengthy footage.
- Funny Moments: Speed up a pet’s silly antics or a friend’s funny reaction for comedic effect.
- Presentations: Make a point more dynamic by speeding up a portion of a video you’re using in a presentation.
- Saving Storage Space: While not the primary reason, shorter videos do take up less space.
The beauty of the iPhone is that it’s designed to make these tasks easy. You don’t need to download extra apps or learn complicated software. The tools you need are already at your fingertips.
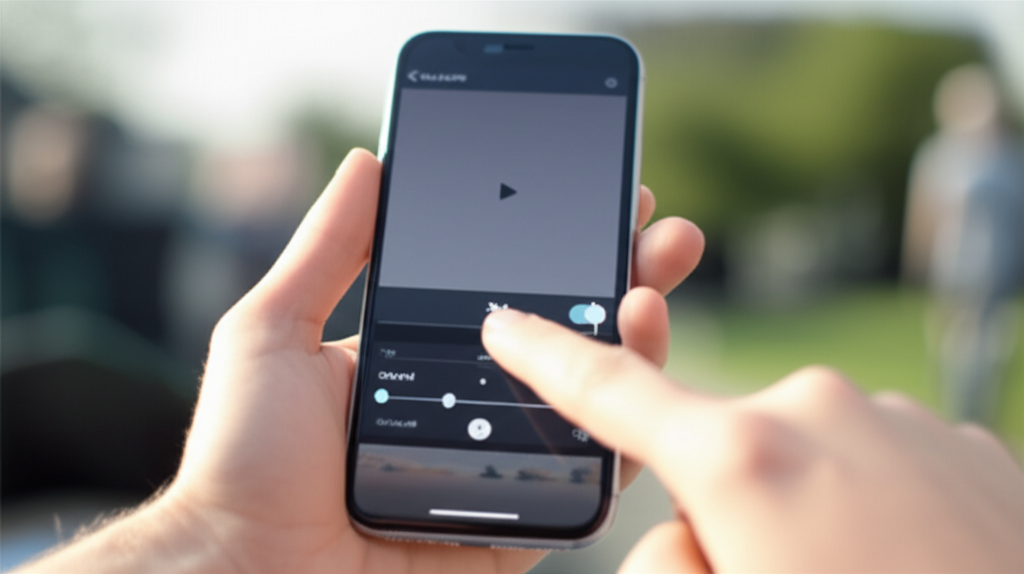
The Genius Trick: Using the Photos App for Basic Speed Adjustments
Did you know you can make some simple speed adjustments directly within the built-in Photos app? This is the most accessible method for most users. While it doesn’t offer granular control over specific speed increments (like 2x, 4x, etc., in a way that’s explicitly labeled), you can achieve a noticeable speed-up effect by trimming and adjusting the playback. It’s more about creating a dynamic viewing experience by shortening the video and making the remaining content play at a slightly more energetic pace, especially when combined with other editing techniques.
However, for true speed control (like doubling or quadrupling the playback speed), you’ll need to use the more robust editing features available in the Photos app’s editing interface, or a dedicated app. Let’s dive into the most effective methods:
Method 1: Using the Photos App’s Built-in Editor (for Speed Control)
This is where the real magic happens for speed adjustments. The iPhone’s Photos app has a surprisingly powerful editor that allows you to do much more than just trim. You can actually change the playback speed of your videos, especially those recorded in slo-motion. For standard videos, the approach is slightly different but still achievable.
For Slo-Mo Videos:
If you recorded your video in slo-motion (which you can do by selecting “Slo-mo” in the camera mode), you have direct control over which part is slow and which part plays at normal speed. This is the most intuitive way to manipulate speed directly on your iPhone.
- Open the Photos App: Find and tap the Photos app icon on your iPhone’s home screen.
- Select Your Slo-Mo Video: Browse through your library and tap on the slo-motion video you want to edit.
- Tap “Edit”: In the top-right corner of the screen, you’ll see a red “Edit” button. Tap it.
- Adjust the Speed Bars: At the bottom of the screen, you’ll see a timeline of your video. For slo-motion videos, there are vertical white bars on this timeline. These bars indicate the sections of your video that will play in slow motion. By default, the entire video might be set to slow motion.
- Drag the White Bars: To make the video play faster overall, you can drag these white bars closer together. This shortens the duration of the slo-motion effect. The video will play at normal speed before the first white bar and after the last white bar. By minimizing the space between these bars, you’re essentially reducing the slow-motion portion, making the rest of the video play back at a faster, more normal speed.
- Preview Your Changes: Tap the play button to see how the speed adjustment looks.
- Tap “Done”: Once you’re happy with the result, tap “Done” in the bottom-right corner.
This method is fantastic for fine-tuning the slow-motion effect, but it primarily works by reducing the slow-motion duration, not by accelerating a standard video clip to 2x or 4x speed directly within this interface. For that, we need another approach.
For Standard Videos (Achieving a “Speed Up” Effect):
While the Photos app doesn’t have a dedicated “Speed Up” button for standard videos like it does for slo-mo, you can achieve a similar effect by using a combination of trimming and potentially a third-party app if you need precise speed increments. However, for a quick and dirty speed-up that makes a video feel more dynamic, you can use the trimming feature creatively.
The core idea here is that if you shorten a video significantly, the viewer’s perception is that the action happened faster. While the actual playback speed doesn’t change, the condensed viewing experience can feel like it’s sped up.
For true speed manipulation of standard videos, you’ll want to move to dedicated editing apps. But let’s explore what the Photos app can do to give a sense of speed:
- Open the Photos App.
- Select Your Video.
- Tap “Edit”.
- Use the Trimming Tool: At the bottom, you’ll see the timeline. Drag the left and right handles inward to cut out unnecessary parts of the video. By removing dead space and focusing on the action, you make the overall clip shorter and more impactful, giving a sense of speed.
- Tap “Done”.
This is a great way to make any video more concise, but it’s not a true speed adjustment. For that, we need more powerful tools.
Method 2: Using iMovie (Free App from Apple)
For more precise control over video speed, including speeding up standard videos to specific rates (like 2x, 4x, etc.), Apple’s free video editing app, iMovie, is your best friend. It’s available for download on the App Store and is incredibly user-friendly, even for beginners.
Steps to Speed Up a Video in iMovie:
- Download and Open iMovie: If you don’t have it, download iMovie from the App Store. Once installed, open the app.
- Start a New Project: Tap “Create Project,” then select “Movie.”
- Import Your Video: Tap the “+” button to add your video clip from your iPhone’s library. Select the video and tap the three dots (…), then tap the movie icon to add it to your project timeline.
- Select the Video Clip: Tap on the video clip in the timeline at the bottom of the screen. This will highlight it with a yellow border.
- Access Speed Controls: Look for the speed icon in the toolbar that appears above the viewer window. It looks like a speedometer. Tap on it.
- Adjust the Speed: You’ll see a slider with options like “Normal,” “Slow,” and “Fast.” To speed up your video, drag the slider towards “Fast.” You can tap on the speed setting (e.g., “2x,” “4x”) to select a specific speed multiplier. The default options are usually 2x and 4x, but you can fine-tune it.
- Preview Your Video: Tap the play button to see your video playing at the new speed.
- Export Your Video: Once you’re satisfied, tap “Done” in the top-left corner. Then, tap the share icon (a square with an arrow pointing up) and choose “Save Video” to save the edited clip back to your Photos app.
iMovie offers a fantastic balance of power and simplicity, making it the go-to for anyone wanting to genuinely change video playback speeds on their iPhone.
Method 3: Using Third-Party Video Editing Apps
While iMovie is excellent, there are many other fantastic third-party apps available on the App Store that offer even more advanced features for speeding up videos, adding effects, and editing in general. Some are free with in-app purchases, while others have a subscription model.
Popular Third-Party Apps for Speed Adjustments:
- InShot: A very popular and user-friendly app that offers easy speed controls, trimming, filters, and more. It’s great for social media content.
- CapCut: Another powerful and free option, often used for TikTok and Instagram Reels. It offers a wide range of editing tools, including precise speed adjustments.
- Splice: A more professional-level editor that’s still quite accessible, offering advanced speed ramping and editing capabilities.
- KineMaster: A feature-rich mobile video editor that allows for precise control over playback speed and other advanced editing techniques.
General Steps for Third-Party Apps:
The exact steps will vary slightly depending on the app, but the general process is similar to iMovie:
- Download and Open the App.
- Start a New Project and Import Your Video.
- Select the Video Clip on the Timeline.
- Find the “Speed” or “Playback Speed” Option: This is usually found in the editing tools menu.
- Adjust the Speed Slider or Select a Preset: Most apps will offer a slider or specific multipliers (e.g., 1.5x, 2x, 3x, 4x).
- Preview and Export: Save your edited video to your camera roll.
These apps often provide more granular control, allowing you to speed up different segments of a video independently, creating dynamic “speed ramps.”
Understanding Video Speed Settings: A Quick Guide
When you’re editing video speeds, you’ll often encounter terms like “x” or “fps.” Here’s a quick breakdown:
| Term | Meaning | Effect on Video |
|---|---|---|
| 1x Speed | Normal playback speed. | The video plays at the speed it was recorded. |
| 2x Speed | Double the normal speed. | The video plays twice as fast, making events happen twice as quickly. The duration of the clip is halved. |
| 4x Speed | Quadruple the normal speed. | The video plays four times as fast. The duration is reduced to one-quarter of the original. |
| 0.5x Speed | Half the normal speed (Slow Motion). | The video plays half as fast, making events appear slower. This is what the slo-mo setting in your camera does. |
| FPS (Frames Per Second) | The number of individual still images (frames) that make up the video each second. Standard video is typically 30fps or 60fps. | Higher FPS means smoother motion. When you slow down a video recorded at a high FPS (like 120fps or 240fps slo-mo), you get very smooth slow-motion effects. When you speed up a video, you’re essentially showing fewer frames per second of the original footage within the new, shorter time. |
For example, if you have a 1-minute (60-second) video and speed it up to 2x, it will now play in 30 seconds. If you speed it up to 4x, it will play in just 15 seconds.
Tips for Best Results When Speeding Up Videos
To ensure your sped-up videos look great and are enjoyable to watch, keep these tips in mind:
- Start with Good Footage: While you can speed up anything, starting with clear, well-lit footage will always yield better results.
- Consider the Content: Speeding up a very fast action might make it incomprehensible. It’s best for processes, movements, or events that have a slower natural pace.
- Don’t Overdo It: While it’s tempting to speed things up dramatically, watch out for jerky movements or a loss of detail. Find a speed that enhances the content without making it look unnatural or unwatchable.
- Use Audio Wisely: When you speed up a video, the audio also speeds up, often resulting in a chipmunk-like sound. You might want to mute the original audio or replace it with faster-paced background music. iMovie and other editing apps allow you to easily detach and remove the original audio.
- Experiment with Speed Ramps: If you’re using iMovie or a third-party app, try gradually increasing or decreasing the speed within a single clip for a more dynamic effect. This is called speed ramping.
- Check Your Export Settings: When saving your video, ensure you’re exporting in a suitable resolution (like 1080p or 4K) and frame rate for where you plan to share it.
- Practice Makes Perfect: The more you experiment with different speeds and editing tools, the better you’ll become at creating professional-looking sped-up videos.
Comparing Editing Options: Photos vs. iMovie vs. Third-Party Apps
Choosing the right tool depends on your needs. Here’s a quick comparison:
| Feature | Photos App (Slo-Mo Only) | iMovie | Third-Party Apps (e.g., InShot, CapCut) |
|---|---|---|---|
| Ease of Use | Very Easy (built-in) | Easy to Moderate | Easy to Moderate (varies by app) |
| Speed Control for Standard Videos | No direct speed multiplier | Yes (2x, 4x, custom) | Yes (often more precise, speed ramps) |
| Slo-Mo Speed Control | Yes (adjusting slo-mo range) | Yes | Yes |
| Audio Manipulation | Limited | Yes (detach, mute, replace) | Yes (detach, mute, replace, add music) |
| Cost | Free (built-in) | Free | Free (often with paid upgrades/subscriptions) |
| Advanced Features | Basic trimming | Transitions, titles, effects, speed ramps | Wide range of effects, filters, text overlays, speed ramps, etc. |
For quick adjustments to slo-mo clips or simply making a standard video more concise by trimming, the Photos app is sufficient. If you want to genuinely speed up a normal video clip or have more control over audio and effects, iMovie is an excellent, free starting point. For the most flexibility, advanced features, and social media-ready edits, explore third-party apps.
Frequently Asked Questions (FAQ)
Here are some common questions beginner iPhone users might have about speeding up videos:
Q1: Can I speed up any video on my iPhone, or only slo-mo videos?
A1: You can adjust the speed of slo-motion videos directly in the Photos app by changing the duration of the slow-motion effect. For standard videos, you’ll need to use iMovie or another video editing app to change the playback speed to 2x, 4x, or other multipliers.
Q2: Will speeding up a video affect its quality?
A2: Generally, speeding up a video doesn’t inherently reduce its quality. However, if you speed it up too much, the motion might appear jerky or less smooth, which can be perceived as a quality issue. Exporting at a lower resolution than the original can also reduce quality.
Q3: How do I remove the audio from a video when I speed it up?
A3: In iMovie, after you select your video clip and tap the speed icon, you’ll see a volume icon. Tap it to mute the original audio. Alternatively, you can detach the audio and delete it. Many third-party apps also have easy options to mute or remove audio.
Q4: What is the fastest speed I can make a video on my iPhone?
A4: iMovie typically offers speeds up to 2x and 4x. Many third-party apps allow for finer control, sometimes offering speeds like 8x or even higher, or allowing you to create custom speed ramps. Be aware that very high speeds can make the video difficult to follow.
Q5: Is there a way to speed up a video without downloading any apps?
A5: Yes, for slo-motion videos, you can adjust the speed range directly within the iPhone’s Photos app. For standard videos, you cannot truly change the playback speed without an app, but you can make them feel faster by trimming them significantly in the Photos app to remove dead space.
Q6: Can I speed up only a part of a video?
A6: The Photos app doesn’t allow you to speed up only a portion of a standard video. However, iMovie and most third-party editing apps do! You can split your video clip, apply a speed change to one segment, and leave the rest at normal speed, or even create smooth transitions between different speeds (speed ramping).
Q7: How do I save the sped-up video?
A7: After editing in iMovie or a third-party app, you’ll typically find a “Share” or “Export” option. From there, you can choose to save the video to your iPhone’s Photos app (Camera Roll). Ensure you select a high-quality export setting if available.
Conclusion
Mastering how to speed up a video on your iPhone is a fantastic skill to have for creating more engaging content, sharing information efficiently, or just having fun with your memories. From the simple adjustments possible within the Photos app for slo-mo clips to the powerful speed controls offered by iMovie and other editing applications, your iPhone is more than capable of transforming your videos. Remember to experiment, play with the different speed multipliers, and consider how audio plays a role in the final product. With these simple techniques, you can easily make your videos more dynamic and captivating, all from the palm of your hand. So go ahead, give it a try, and impress your friends with your newfound video editing prowess!