

Quick Summary: Transferring data to your new iPhone is easy! Use Apple’s Quick Start for a direct phone-to-phone transfer or restore from an iCloud or computer backup. Our guide breaks down each method with simple steps, ensuring all your apps, photos, contacts, and settings move seamlessly to your new device.
Getting a new iPhone is exciting! It’s like opening a fresh notebook, ready for all your thoughts and memories. But the thought of moving all your important stuff – photos, apps, messages, contacts – can feel a bit daunting. Many people worry about losing data or spending hours trying to get everything set up just right. You might think it’s complicated, involving lots of technical steps. But I’m here to tell you, it doesn’t have to be! With a few simple methods provided by Apple, you can transfer your data effortlessly. This guide will walk you through each step, making the process smooth and stress-free, so you can start enjoying your new iPhone right away. We’ll cover the easiest ways to get your digital life from your old phone to your new one, without any fuss.
Why Transferring Data is Important
Moving your data to a new iPhone is crucial for several reasons. It ensures you don’t lose precious memories like photos and videos, or vital information like contacts and messages. It also saves you a lot of time and hassle compared to manually re-entering everything. A smooth data transfer means your new device is ready to go, personalized just the way you like it, with all your favorite apps and settings intact. This helps you stay productive and connected from the moment you power on your new iPhone.
Before You Begin: Essential Preparations
Before we dive into the actual transfer, let’s make sure you’re all set up for success. A little preparation goes a long way in making the process smooth and preventing any unwanted surprises.
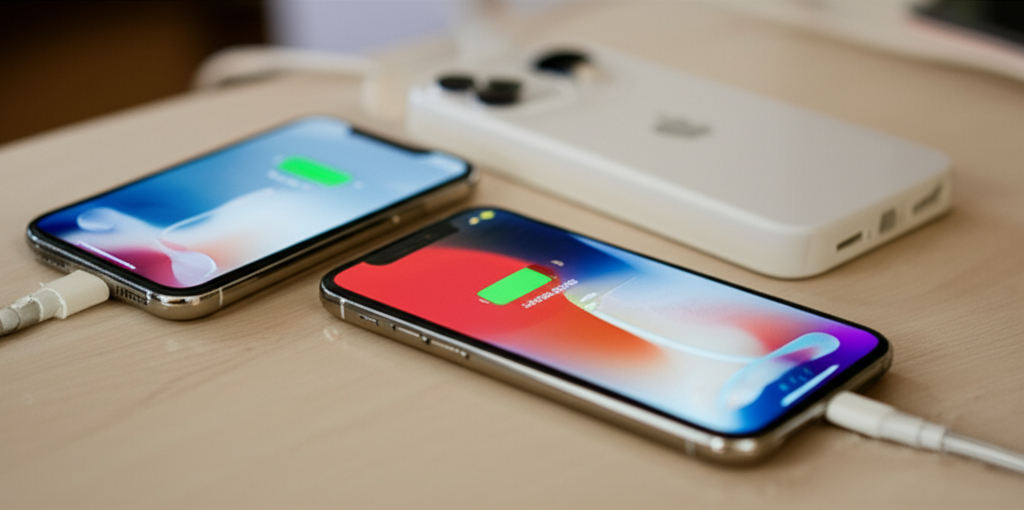
- Charge Both iPhones: Ensure both your old and new iPhones have at least 50% battery life, or keep them plugged into a power source during the transfer. This prevents interruptions.
- Wi-Fi Connection: A stable Wi-Fi network is essential, especially for iCloud backups and the Quick Start method. Make sure your Wi-Fi is working reliably.
- Apple ID and Password: You’ll need your Apple ID and password to sign in and restore your apps and data. If you’ve forgotten it, you can reset it on Apple’s website. Visit iforgot.apple.com for assistance.
- iOS Version: For Quick Start, both iPhones need to be running iOS 11 or later. For other methods, having the latest iOS version is always a good idea for security and compatibility. Check for updates in Settings > General > Software Update on your old iPhone.
- SIM Card: If you’re moving your physical SIM card, have it ready. If you’re using eSIM, you’ll be guided through setting that up during the new iPhone’s activation process.
- Backup Your Old iPhone: Even though we’re transferring data, it’s always wise to have a recent backup of your old iPhone. This is your safety net!
Method 1: Quick Start – The Easiest Way (iPhone to iPhone)
Quick Start is Apple’s magical feature designed to make setting up a new iPhone incredibly simple. If you have both your old and new iPhones with you, this is usually the fastest and most straightforward method. It allows you to transfer data directly from your old device to your new one wirelessly.
How Quick Start Works
When you turn on your new iPhone and place it near your current iPhone, a “Quick Start” screen will appear on your old iPhone. This screen offers the option to use your Apple ID to set up your new device. You’ll then be prompted to scan a special animation on your new iPhone using your old iPhone’s camera. This pairs the devices securely. After that, you can choose to transfer data directly from your old iPhone or download your most recent iCloud backup. It’s designed to be intuitive and requires minimal technical knowledge.
Step-by-Step Guide for Quick Start
- Turn on Your New iPhone: Press and hold the side button until you see the Apple logo.
- Place Devices Near Each Other: Keep your new iPhone near your current iPhone.
- See the Quick Start Screen: Your current iPhone should display a “Quick Start” screen offering to set up your new iPhone with your Apple ID. Tap “Continue.”
- Scan the Animation: A blue circular animation will appear on your new iPhone. Hold your current iPhone over your new iPhone so that the animation is centered in the viewfinder. Wait for the “Finish on New iPhone” message.
- Enter Passcode: Enter your current iPhone’s passcode on your new iPhone when prompted.
- Set Up Face ID or Touch ID: Follow the on-screen instructions to set up Face ID or Touch ID on your new iPhone.
- Transfer Your Data: You’ll see an option to “Transfer from iPhone.” This will start a direct transfer from your old iPhone to your new one. Keep both devices close and connected to Wi-Fi until the transfer is complete. The time this takes depends on the amount of data you have.
- Complete Setup: Once the transfer is done, your new iPhone will restart. You can then finish setting up any remaining features like Apple Pay or Siri.
Tip: If Quick Start doesn’t appear, go to Settings > General > Transfer or Reset iPhone on your new iPhone, then tap “Start Now” and follow the on-screen instructions. Make sure Bluetooth is turned on for both devices.
Method 2: Restore from iCloud Backup
If you don’t have your old iPhone handy, or if you prefer to use a backup stored in the cloud, restoring from an iCloud backup is a great option. This method requires you to have recently backed up your old iPhone to iCloud.
What is an iCloud Backup?
iCloud Backup automatically saves your iPhone data – including app data, device settings, home screen layout, iMessage history, photos, videos, and more – to Apple’s servers. You can enable iCloud Backup in Settings > [Your Name] > iCloud > iCloud Backup. Apple provides 5GB of free iCloud storage, but you can purchase more if needed. A recent iCloud backup ensures that your new iPhone can be populated with your digital life.
Step-by-Step Guide for Restoring from iCloud Backup
- Turn on Your New iPhone: Press and hold the side button until the Apple logo appears.
- Follow Initial Setup Steps: Proceed through the initial setup screens, including selecting your language and region.
- Connect to Wi-Fi: Connect to a reliable Wi-Fi network.
- Reach the “Apps & Data” Screen: On the “Apps & Data” screen, choose “Restore from iCloud Backup.”
- Sign in to iCloud: Enter your Apple ID and password.
- Choose a Backup: Select the most recent backup of your old iPhone from the list of available backups. You can see the date and time of each backup.
- Wait for Restoration: Your iPhone will begin restoring your data. Keep your Wi-Fi connection active and your iPhone powered on. Apps and photos will continue to download in the background even after the setup is complete.
- Complete Setup: Once the restore is finished, your iPhone will restart. You can then finish setting up your Apple ID, Face ID/Touch ID, and other settings.
Important Note: Ensure your iCloud backup on your old iPhone is up-to-date. You can check this by going to Settings > [Your Name] > iCloud > iCloud Backup on your old iPhone and tapping “Back Up Now” if necessary.
Method 3: Restore from Computer Backup (Mac or PC)
If you prefer to keep your backups local or have limited iCloud storage, backing up and restoring from your computer is a reliable alternative. This involves using Finder on a Mac or iTunes on a PC.
What is a Computer Backup?
A computer backup creates a copy of your iPhone’s data directly onto your Mac or PC. This backup can include almost everything from your iPhone, such as photos, videos, contacts, messages, app data, and settings. It’s a good option if you have a large amount of data or prefer not to rely on cloud storage. You can also choose to encrypt your backup, which saves sensitive information like passwords and Wi-Fi settings.
Step-by-Step Guide for Restoring from Computer Backup
On a Mac (macOS Catalina or later):
- Connect Your New iPhone: Connect your new iPhone to your Mac using a USB cable.
- Open Finder: Open a Finder window.
- Select Your iPhone: In the Finder sidebar, click on your iPhone under “Locations.” You might need to tap “Trust” on your iPhone and enter your passcode.
- Back Up Your Old iPhone (First!): Before restoring to your new iPhone, ensure your old iPhone is backed up. Connect your old iPhone to your Mac, select it in Finder, and click “Back Up Now.” Consider checking “Encrypt local backup” to save passwords and Health data.
- Restore to New iPhone: With your new iPhone connected, select it in Finder. Click “Restore Backup.”
- Choose Backup and Restore: Select the backup you created from your old iPhone. Click “Restore.”
- Wait for Restoration: Keep your iPhone connected to your Mac until the restore process is complete. Your iPhone will restart.
- Complete Setup: Follow the on-screen setup steps on your new iPhone, including signing in with your Apple ID and setting up Face ID/Touch ID.
On a PC or Mac (macOS Mojave or earlier) using iTunes:
- Install or Update iTunes: If you don’t have iTunes, download it from the Apple website. Ensure you have the latest version installed.
- Connect Your New iPhone: Connect your new iPhone to your computer using a USB cable.
- Open iTunes: Open iTunes.
- Back Up Your Old iPhone (First!): Connect your old iPhone to your computer. In iTunes, click the iPhone icon, then click “Summary.” Click “Back Up Now” under Backups. Consider checking “Encrypt local backup.”
- Restore to New iPhone: With your new iPhone connected, select it in iTunes. Click “Restore Backup.”
- Choose Backup and Restore: Select the backup you created from your old iPhone. Click “Restore.”
- Wait for Restoration: Keep your iPhone connected until the restore is complete. Your iPhone will restart.
- Complete Setup: Follow the on-screen setup steps on your new iPhone.
Pro Tip: Encrypting your local backup is highly recommended. It transfers more data, including Wi-Fi passwords, website history, and Health data, which makes your new iPhone feel even more like your old one right from the start.
Comparing the Transfer Methods
Each method has its own advantages. Choosing the right one depends on your situation and preferences. Here’s a quick comparison to help you decide:
| Feature | Quick Start | iCloud Backup | Computer Backup |
|---|---|---|---|
| Speed | Generally fastest if Wi-Fi is strong. | Can be slower depending on internet speed and backup size. | Usually faster than iCloud if you have a fast USB connection. |
| Convenience | Very convenient, phone-to-phone. | Convenient, no computer needed. | Requires a computer and USB cable. |
| Data Transfer | Directly from old iPhone. | From Apple’s servers. | From your computer. |
| Requirements | Both iPhones, Bluetooth on, Wi-Fi. | Wi-Fi connection, iCloud account. | Computer (Mac/PC), USB cable, iTunes/Finder. |
| Best For | Moving directly to a new phone when you have both. | No computer available or prefer cloud storage. | Large data amounts, limited iCloud storage, or prefer local backups. |
What Data Gets Transferred?
Regardless of the method you choose, Apple aims to transfer as much of your digital life as possible. Here’s a general overview of what you can expect to be transferred:
- Apps: All your downloaded apps will be transferred. They will need to re-download from the App Store, which happens in the background after setup.
- Photos and Videos: Your entire photo library, including videos, will be transferred.
- Contacts: All your contacts will be moved.
- Messages: iMessage and text message history are typically included.
- Device Settings: Wi-Fi passwords, Bluetooth pairings, wallpaper, display settings, and other preferences are usually transferred.
- Health and Activity Data: If you encrypt your computer backup or use Quick Start, this data is transferred.
- App Data: Data within your apps (like game progress, saved documents, etc.) is transferred if the app developer has supported it.
- Notes: Your notes are synced and transferred.
- Calendar: Your calendar events are preserved.
- Safari Bookmarks and History: Your browsing data comes along.
Note: While Apple transfers a lot, some app-specific data might require you to log back into those apps or might not transfer if the app developer hasn’t implemented it correctly. It’s always a good idea to check important apps after the transfer.
Troubleshooting Common Issues
Even with these straightforward methods, sometimes things don’t go exactly as planned. Here are a few common issues and how to solve them:
- Quick Start Not Appearing: Ensure Bluetooth is enabled on both iPhones and they are close enough. Restart both devices if it doesn’t show up.
- Transfer is Too Slow: A weak Wi-Fi signal is the usual culprit. Try moving closer to your router or restarting your router. For computer backups, ensure you’re using a fast USB cable.
- “Unable to Restore” Error: This can happen due to a corrupted backup or an unstable connection. Try creating a new backup on your old iPhone and then attempt the restore again. If using a computer, try a different USB port or cable.
- Apps Not Appearing After Restore: Apps download in the background. Give your new iPhone some time connected to Wi-Fi. If an app is still missing, check the App Store to download it manually.
- Forgot Apple ID Password: If you can’t remember your Apple ID password, you’ll need to reset it at iforgot.apple.com before you can restore from iCloud or set up your new iPhone.
For more in-depth troubleshooting, Apple’s support website offers comprehensive guides. You can find official assistance at Apple Support.
Frequently Asked Questions (FAQ)
How long does it take to transfer data to a new iPhone?
The time varies greatly depending on the amount of data you have and the method used. Quick Start and computer backups can take anywhere from 15 minutes to over an hour. iCloud restores can take longer, especially if your internet connection is slow, potentially several hours for very large backups.
Do I need to sign out of my old iPhone before transferring?
No, you don’t need to sign out of your old iPhone. If you use Quick Start, the process handles the transfer seamlessly. If you are using iCloud or computer backups, the data is already captured from your old phone. However, after you are completely finished and satisfied with your new iPhone, you can erase your old iPhone to protect your privacy before selling or giving it away.
Can I transfer data from an Android phone to a new iPhone?
Yes! Apple provides an app called “Move to iOS” on the Google Play Store. This app helps you transfer contacts, message history, camera photos and videos, web bookmarks, mail accounts, and calendars wirelessly from your Android device to your new iPhone. You’ll use this app during the initial setup of your new iPhone.
What if my new iPhone doesn’t have enough storage for my old iPhone’s data?
You’ll need to ensure your new iPhone has enough storage capacity to hold all the data from your old iPhone. If your new iPhone has less storage than your old one, you’ll need to free up space on your old iPhone before backing it up or transferring. This might involve deleting unused apps, offloading photos to a computer, or managing your iCloud storage.
Will my cellular plan transfer to my new iPhone?
Your cellular plan is tied to your SIM card or eSIM. If you are transferring your physical SIM card from your old iPhone to your new one, your plan will work immediately. If your new iPhone uses eSIM, you will be guided through transferring your existing eSIM or setting up a new one during the activation process.
What should I do with my old iPhone after transferring data?
Once you’ve confirmed all your data has been successfully transferred to your new iPhone, it’s a good idea to erase your old iPhone to protect your personal information. Go to Settings > General > Transfer or Reset iPhone > Erase All Content and Settings on your old iPhone. This will reset it to factory settings.
Conclusion
Transitioning to a new iPhone doesn’t have to be a complicated affair. With Apple’s intuitive Quick Start feature, the convenience of iCloud backups, or the reliability of computer backups, you have several excellent options to ensure all your essential data makes the move with you. By following these simple, step-by-step guides, you can confidently transfer your apps, photos, contacts, and settings, setting up your new device with ease. Remember to prepare by charging your phones, ensuring a good Wi-Fi connection, and having your Apple ID ready. With your digital life safely on your new iPhone, you can start exploring all its new features and enjoy the experience without any data worries. Happy switching!